Category Archives: Mustang

Radio and Instrument Cluster

This post will cover several days work since I haven’t posted in a while.  I got past some personal drama at home and was able to start back to work on the Mustang this week.  Since I was still waiting on my dash clock the frirst order of business was to wire things up for the radio.  I had chosen to go with a RetroSound Model Two as it has a retro sort of look and has all the features I was looking for, mainly a USB port and BlueTooth.  If money wasn’t an issue I would have had my AM radio updated with an FM conversion and both of those features.  But the RetroSound radio was several hundred dollars less than the full blown conversion, so I chose that route.  I’m not ready for a permanent install just yet, but wanted to wire and test everything while the dash was still apart.

I had a replacement radio antenna waiting so I installed it first.  It didn’t quite match the hole in my fender but a little work with a round file fixed that up.  Long arms helped run the cable up above the kick panel and behind the dash.  The radio requires both a constant 12V and a switched 12V.  I got the switched 12V off the back of the ignition switch.  The hardest part of that was I dropped the nut from the back of the ignition switch and never found it again.  I spent way too much time searching for a suitable replacement.  For the constant 12V I tapped into the cigar lighter circuit since it was handy.

The front speakers were already installed in the dash.  This was a pair of 3.5″ speakers in the stock location.  I made up a harness to extend the wires coming out of these speakers.  I also confirmed the positive and negative terminals to ensure everything ended up in phase.  For the rear speakers I had run some speaker wire about 30 years ago.  Some quick continuity testing showed there were no shorts and the wiring was still good.  I connected the radio wiring harness with all four pairs of speaker wires and wired up the rear speakers temporarily.  Everything worked, but the sound quality from the rear speakers was pretty poor.  They sounded very tinny.  I double checked the polarity and everything was in phase.  At that point I assumed they would sound better once installed in their permanent location.

By this point my dash clock had arrived.  I quickly installed it in the instrument cluster and then hooked up the cluster to test out the clock and the LED bulbs I had installed a few weeks ago.  Everything worked, but the dimmable LED bulbs didn’t really live up to their name.  I guess I can live with that.  I went ahead and buttoned up the instrument cluster.  It took quite a bit of fiddling to get everything all lined up.  The heater controls never lined up with the instrument cluster for as long as I’ve owned the car.  I got it kind of close, but it still doesn’t line up all that well.

Here’s a picture of the installed instrument cluster

IMG_0942

It was finally time to put the steering wheel back on.  Or so I thought. I pulled out the deluxe steering wheel I had purchased about 30 years ago and looked it over.  Comparing to a diagram I had showed that all the major parts were there.  However some of the small hardware parts were missing.  A trip to the online catalog for CJ’s Pony Parts revealed that you can purchase the small parts kit for this wheel.  So now I’m waiting for steering wheel parts.  But I was able to install the turn signal lever and emergency flasher button.  The small parts kit is scheduled to be delivered tomorrow so I hope to get the wheel repaired and installed by the end of the week.

I still had those pesky rear speakers to deal with.  I had a new package tray which I had purchased 30 years ago.  I also had some speaker grilles to go in the package tray.  My plan was to install the speakers under the package tray structure and put the grilles up top.  I debated back and forth between painting the package tray or covering it.  In the end I decided that a nice vinyl cover would look better.  Not authentic but I thought I would like the look better.  I went to the fabric store and purchased a nice piece of red vinyl to cover the tray.  I carefully marked, drilled, and cut holes in the metal package tray structure, the package tray cover, and the AcoustiShield insulation.  Then I stretched the vinyl around the package tray cover and stapled it in place.  It was a bit of a struggle to bolt everything together as my careful measuring and drilling wasn’t quite as good as I had hoped.  But I got it all together eventually.  And the speakers sound much better in their final home than they did sitting on the floor of the car.

Here are a few pictures of the package tray and speaker grilles.

IMG_0943 IMG_0944 IMG_0945 IMG_0941


Interior Continued

I haven’t posted for a while but I’ve still been keeping busy.  My instrument cluster parts haven’t arrived yet (been on back order for close to a month now).  So I’ve been working around the dash.  I did have an opportunity to install some more of the AcoustiShield kit.  I applied the DynaMat strips to the roof.  I was concerned that they wouldn’t stick but they seemed to stay in place well enough.  I tapped on the roof before and after I applied the DynaMat.  There was a noticeable difference but the vibration wasn’t as well damped as I would have liked.  I went ahead and installed the heat shield and then tapped on the roof again.  This time I was happy with the resulting thud sound with no vibration at all.  I also installed some of the AcoustiShield that go on the inner wheel houses, the kick panels, and test fitted some of the rear seat parts.

I’m holding off on the rest of the kit until some of the body and paint is done.  I wanted to leave access to the back of the panels for the body person.  I also gave some thought to how I will cover up the heat shield in the trunk.  The reproduction trunk mat will not cover the wheelhouses and quarter panels so the foil from the heat shield will show through.  I really don’t want the trunk to look like a house with no siding.  I will probably either build something to cover it up or purchase one of the trunk carpet kits that cover the entire trunk.  The only issue I have with the kit is the expense.  But I have plenty of time to consider my options.

Next I chose to tackle the carpet.  I had a carpet set I purchased several years ago.  I laid it out in the interior and let it sit overnight to help it flatten out and for the creases to settle out of the carpet.  The next day I carefully laid both pieces out and spent quite a bit of time making sure I was happy with how it aligned with the floor pans.  I’ve seen a lot of complaints online regarding the fit and finish of the carpeting.  My opinion is that the quality of the carpet isn’t that great.  However I don’t have any really big complaints about the fit.  I had to do some minor trimming and everything else just fell into place.

I started with the rear carpet.  After adjusting it I had it right where I wanted it.  I smoothed it out over the transmission tunnel and used the seat belt bolts to hold it tightly in place.  Then I laid out the front carpet.  I had to cut a hole for the shifter before I could lay it out completely.  I also had an issue with my headlight dimmer switch.  It seems that it only had one screw holding it in place, and there was no hole for the second screw.  Apparently the restoration shop that installed my floor pans failed to complete installing the dimmer switch.  I drilled the second hole and mounted it more securely.  Then I made the hole for the dimmer and inserted the plastic grommet that came with the carpet set.  My understanding is that the original carpet did not have a grommet for the dimmer switch, but I think the grommet looks cleaner so I used it.

Next up was the reproduction kick panels.  I still had the originals, but they had crumbled as the plastic hardened with age.  I was surprised to see that the new kick panels had no screw holes in them.  So I used the original kick panels as templates to drill new holes in the reproduction panels.  When I installed the panels the holes lined up perfectly.  After the kick panels I installed the door sill plates.  One thing I didn’t mention is how handy having a pick or awl will be when installing the carpet.  I used one to help locate any holes and line up the trim panels.

While I was working on the carpet I noticed a couple of items that were bothering me.  The first was the driver’s side vent controls.  The vent uses a cable to open and close the vent.  I noticed that the cable was rubbing up against the clutch linkage and pedal support.  After looking a bit further I saw that a bracket that holds the cable assembly had come detached from the vent housing.  I was familiar with the bracket as I had repaired it in the past.  It is held on by pop rivets and I used pop rivets the last time I had repaired it in an attempt to remain true to the factory way of securing the bracket.  I went ahead and removed the vent assembly, which is not an easy part to get to.  Then I drilled out the pop rivets and used some number 8 screws, washers, and nuts to secure the bracket.  Then I reinstalled the vent assembly under the cowl.

The second cause for concern was that the heater and defroster controls didn’t line up when they were all in the fully raised position.  I know they were aligned in the past because I was careful to install them that way years ago.  Either parts had shifted, or the restoration shop that removed and replaced the heater box when they did the rust work on my cowl didn’t adjust them correctly.  It was a fairly simple task to adjust them so that they all lined up correctly.  I loosened the adjustment screws, moved the the controls to the fully raised position and tightened the adjustment screws back down.  Now the controls line up properly.

Now it was time to reinstall the front seats.  I had already re-upholstered the passenger seat so I installed that one first.  I had to poke some holes in the carpet using my trusty pick and then enlarged them by poking a screwdriver through the holes.  When I got to the driver’s seat I debated whether to reinstall it and re-upholster it later or do everything now.  I was still waiting for parts so I chose to re-upholster now.  I installed new seat foam and covers on the driver’s seat, as well as recovering the rear seat.  Then I installed the front seat.  I’m leaving the rear seat until after I finish up installing the rear speakers and wiring, along with the package tray.

Here are some pictures of the work so far.  They show the dash and pad, seats, carpet, and some of the AcoustiShield kit.

IMG_0939 IMG_0935 IMG_0936 IMG_0937 IMG_0938

Since I’m still waiting for my instrument cluster parts, I plan to tackle the radio wiring and rear speakers next.  I plan to install the new radio antenna since it is easy to drop down into the fender when it comes time to paint the car.  I don’t have my new radio yet, but I can begin preparing the speaker and power wiring for it so that I won’t need access behind the instrument cluster when I do get around to installing it.  However I know that I will be busy with personal matters for the next week or more.  So no work will be done for a while.  Hopefully my dash clock will arrive by then so I can button up the rest of the interior when I get back to work.

Sound and Heat Proofing

After I finished painting the dash I was torn between re-assembling it or applying some sound proofing and heat barrier to the interior.  I decided to continue with re-assembling the dash so as to get the car back to a drivable condition as soon as possible.  The plan sounded good on paper but things don’t always go as planned.  The real hold up is that I am waiting on some parts.  I could put the dash back together and then remove the instrument cluster again after the parts come in.  But I have plenty to do in the mean time so I decided to wait for the parts before I install the instrument cluster.

Of course the instrument cluster didn’t prevent me from installing the rest of the dash.  I installed the dash pad and trim, the knee kick pad, the heater control panel, and the dash trim panels on the passenger side of the dash.  The fit for some of the pieces was extremely tight.  I’m attributing this to the new dash pad, which looks nice but doesn’t quite match the original.  It is thicker and the embossed trim on the edges is a little bit different.  But since I’m not building a concours restoration this pad will work OK.  While I was assembling the dash I realized that I needed to order a few items.  I thought I had screws for the instrument cluster but I didn’t.  The new dash trim panel that goes over the glove box was missing a small running horse.  And the glove box rubber bumpers had crumbled and fallen apart.  I also wanted to replace the dash clock in the instrument cluster.  Both the clock and the screws are on back-order which is why I haven’t been able to finish up the dashboard yet.

While I was working on the dash I received a delivery with my Quiet Ride AcoustiShield kit.  This kit contains sound damper and heat barrier to do the interior, roof, and trunk of my car.  Since the dash was on hold I decided to try and tackle this kit.  The installation isn’t that difficult, but there are a lot of pieces and it is time consuming to install.  Today I worked on the interior floor.  I removed the seats, seat belts, shifter boot, and dimmer switch.  Then I cleaned up the floor as much as I could. The kit uses Dynamat and contact cement, neither of which will adhere to dirt.

Next I laid out the pieces of Dynamat according to the instructions.  The kit comes with pre-cut pieces of Dynamat and a diagram that shows you where to place them.  After I had laid them all out I peeled off the backing from each piece, exposing the adhesive.  Then I stuck down the Dynamat and pressed it on to the floor using the roller that was supplies in the kit.  Not very difficult so far.

The next part, applying the thermal barrier, was a bit more challenging.  I laid out all the pieces on the floor of the car to see where and how they would all fit.  I ended up with a couple of small pieces left over.  I’m hoping that it will become evident where they fit after I install the remaining parts of the kit.  For the big parts I could identify I sprayed contact cement on the floor and the back of the heat barrier and glued the pieces down.  The last step was to seal the seams and edges with the supplied foil tape.

The end result is not quite as perfect as I would have liked, but it came out pretty well.  Tomorrow I plan to install the AcoustiShield kit for the roof of the car, and any parts of the trunk and body kits that require access through the interior.  They will be much easier to install while the interior is removed.  I also plan to post some pictures so you can see how it turned out.

Dash Refurb

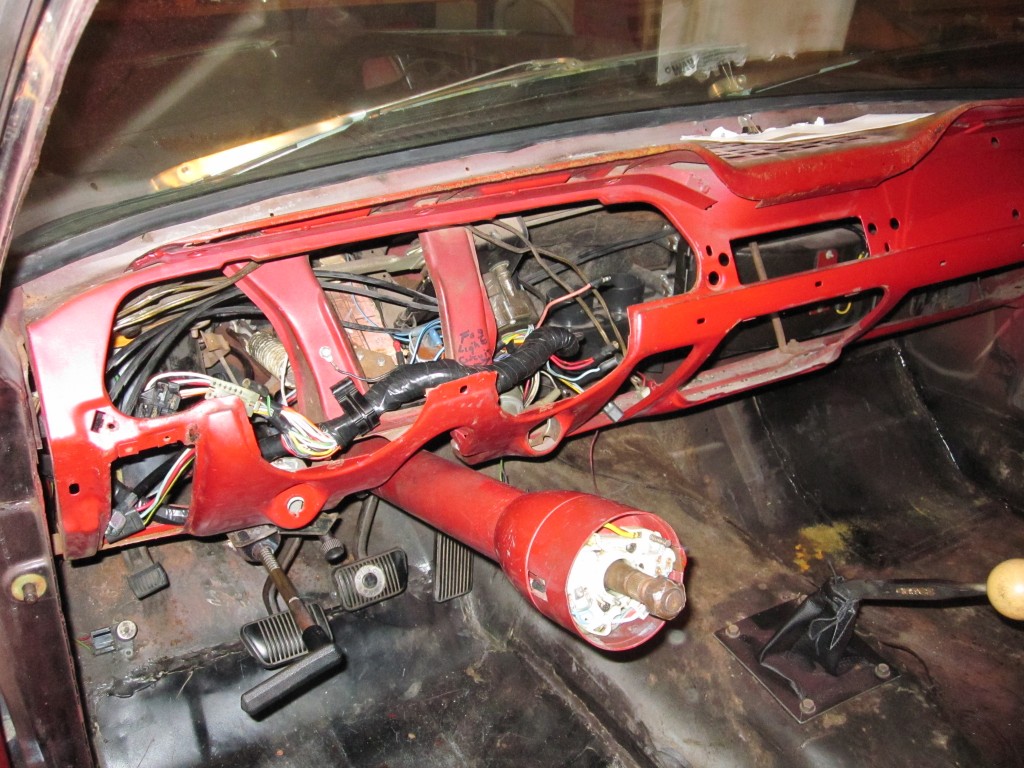
Next on my list is to repaint the dashboard.  It doesn’t look too bad but could definitely use some sprucing up.  I went right to work stripping off all the trim panels, the defroster controls, the instrument cluster, the knee kick pad, and the dash pad.  I also removed the headlight switch, the ignition switch, the seat belt warning light, the fog light switch, the parking brake handle and the vent control.  Finally I pulled the steering wheel, turn signal lever and emergency flasher switch.  Then I dropped the steering column and removed the rubber bumpers for the glove box.  At this point I did some looking around and noticed that the one of the defroster hoses had a tear in it.  So I removed the defroster vents from the dash and replaced the hoses with a pair I had on the shelf.

Here are some pictures of the stripped dashboard.  The paint is really much worse than it looks in the pictures.

IMG_0924 IMG_0925 IMG_0922 IMG_0923

I spent some time looking over some of the old parts and comparing colors with the new parts.  I decided to keep the steering wheel pad and the knee kick pad.  I gave them a thorough cleaning and then used some vinyl paint to make them look a little bit newer.  I also did some scrubbing with 0000 steel wool on the ash tray compartment.  It cleaned up quite a bit but still isn’t as good as new.  I’ll probably use it for now and think about replacing it at a later date.  The defroster controls could also use some cleaning up.  The chrome is a bit pitted bit I think I can make it look passable with some more cleaning and polishing.

Update: Today I scuffed up the dash and steering column.  Then I cleaned everything carefully with mineral spirits and masked as best as I could.  After two coats of primer here’s how everything looked.  I will admit that I got a lot of over-spray on the heater and defroster boxes.  That was because I forgot to pull the drop cloth I was using to cover the floor far enough up under the dash.  I’ll have to try and clean up that mess after I finish with the painting.

IMG_0928 IMG_0929 IMG_0930 IMG_0931

I let the primer flash for about 30 minutes.  Then on to the actual painting.  I used two light coats rather than one heavy coat.  The first coat just barely colored the primer.  After the second coat everything was covered fairly well.  I’m not ready to reinstall all the dash parts yet because I’m still waiting for my acoustic and heat shielding to arrive.  Some of the shielding will go on the dash so I want to keep everything as open as i can until after I install the shielding.  It should be here in the next few days.  In the mean time I can clean up the over-spray mess I made as well as cleaning up any of the old hardware I need to reuse.

Here’s some pictures showing how the paint on the dash came out.

IMG_0932 IMG_0933 IMG_0934

The Doors

The car is now sitting safely in the garage and I’m rested up from my vacation.  Time to get back to work.  The job that I had set for myself to perform next was painting the interior and cleaning and lubricating the window and door lock mechanisms.  Val had done some work on one of the rear windows, but the rest of the car hadn’t been cleaned and lubricated in a very long time.

I decided to tackle the interior one part or section at a time.  This would permit me to keep the car drivable while I was working on it.  This decision would force me to perform tasks in an order that wasn’t the most optimal, but would help prevent the car from being disassembled and then risking having it sit for a long time.  So I chose to work on the interior prior to painting.  This is in contrast to dissembling the entire car, painting it, and then reassembling.

The paint on the interior of the driver’s side door had some rust poking up through the paint.  The most likely cause was from the sweat of a person’s arm resting on the top edge of the door while driving.  This rust has been peeking up through the paint for as long as I’ve owned the car.  I tried to repair it years ago with a wire wheel and some paint.  The end result was some remaining rust and paint that was so thick it was starting to fill in the grain in the metal on the door.  I decided that the best fix was to completely strip and repaint both doors.

Step number one was to take off the door handle and window crank.  The door panel and arm rest were already removed.  Then I removed the vent window assembly.  It was pitted and the weatherstrip on it had hardened and was falling apart.  Finally I pried out the door run weather stripping and scraped off the lower door opening weather strip.

The next step was to apply paint stripper and try to get the many layers of paint off of the door.  It took several applications and scraping sessions to remove some of the paint.  Then I spent about two hours with a drill and a wire wheel to remove the rest of the paint and the rust.  The metal on the door was looking nice and shiny at this point.  There were a couple of very noticeable dents in the lower part of the door.  I used a hammer and dolly to try and knock the dents back out as much as I could.  I’m not an experienced body man, and I couldn’t use any filler as it would fill in the grain in the door.  So it didn’t come out absolutely perfect, but the dents are much harder to see.

Here’s a couple of pictures of the passenger door after stripping.

IMG_0917 IMG_0918

Now I was ready to paint.  I taped up the areas I didn’t want to paint and cleaned off the metal with mineral spirits.  I started with a coat of self etching primer.  That went on nice and smooth, and the door looked pretty god after the primer had flashed.  For color I used a can of interior paint I purchased from one of the mustang parts vendors.  It is supposed to match the original paint used by Ford at the factory.  To my eye it matches pretty well.  I applied a very light coat for the first coat.  Not even enough to completely cover the primer.  I let that dry for about 15 minute and applied another very thin coat.  The idea was to cover everything but not fill in the metal grain.  It probably isn’t show car worthy, but I think it came out pretty well.

Next I disassembled the vent window, removed all of the weather stripping, and cleaned it thoroughly.  The chrome was a bit pitted and scratched.  I cleaned and polished it the best I could, but it still looks a bit shabby.  I decided to live with it and spare the expense of replacing both vent window frames.  I hope i don’t regret that decision later.  There are several pieces of weather stripping on the vent window.  There is one that goes along the side of the frame, One that goes on teh front of the frame, one that surrounds the vent window, and the front door run.  I replaced all of them since none of them were in serviceable condition.

Here’s a picture of the door after painting and reinstalling the vent window.  The light isn’t the best in my garage but hopefully it shows enough detail.

IMG_0909IMG_0910